
Ingredients Needed for Brewing an IPA at Home
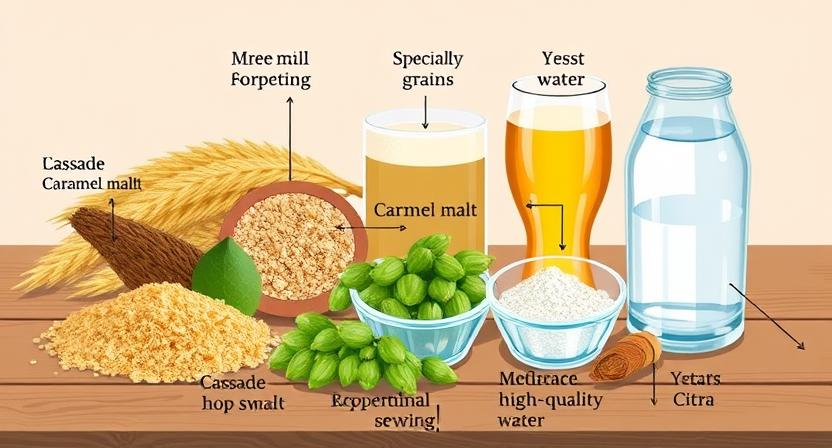
For brewing an IPA at home, you will need a specific set of ingredients that contribute to the distinct flavors and aromas of this beloved beer style. To achieve the hop-forward profile characteristic of IPAs, you will require malted barley for the base malt, along with specialty grains such as caramel malt to add complexity to the brew. Additionally, a generous amount of hops, both for bittering and aroma purposes, is essential. Varieties like Cascade, Centennial, and Citra are popular choices for IPAs due to their floral, citrusy, and piney characteristics.
Yeast is another crucial ingredient in brewing an IPA, as it plays a significant role in fermenting the sugars into alcohol and imparting specific flavors to the final product. Opt for a yeast strain that complements the hoppy notes of the IPA style, such as a clean American ale yeast or a more expressive British ale yeast. Water, often overlooked but vital, should be of high quality and free from any off-flavors that could negatively impact the taste of your homebrewed IPA.
Gathering the Necessary Equipment for Home Brewing
When it comes to home brewing, having the right equipment is essential for a successful batch of IPA. Some necessary tools include a large brewing kettle, fermenter with an airlock, hydrometer for measuring specific gravity, thermometer for monitoring temperatures, siphon for transferring liquids, and bottles with caps for storing the finished product. Additionally, you will need ingredients like malt extract, hops, yeast, and water to brew your IPA.
Investing in quality equipment from the outset can make the brewing process more efficient and enjoyable. Look for suppliers that offer starter kits specifically designed for brewing IPAs, as these often include most of the essential tools needed for the job. Remember to clean and sanitize all equipment thoroughly before each use to prevent contamination and ensure the best possible outcome for your home-brewed IPA.
Preparing Your Workstation for Brewing
Before starting the brewing process, it is crucial to ensure that your workstation is clean and sanitized. All equipment and surfaces must be thoroughly cleaned to prevent contamination during brewing. Wash all tools and containers with hot water and mild detergent, and then sanitize them with a brewing-specific sanitizer to eliminate any bacteria that could spoil your IPA.
Organize your workstation by laying out all the necessary equipment and ingredients in an orderly manner. Having everything within easy reach will streamline the brewing process and prevent any last-minute scrambling to find what you need. Make sure to have a reliable heat source, such as a stovetop or burner, ready for boiling the wort. A clutter-free and well-prepared workstation will set the stage for a successful brewing session and help you focus on creating a delicious batch of IPA.
Understanding the Mashing Process
To understand the mashing process in home brewing, it is essential to grasp the critical role that enzymes play in this stage. During mashing, crushed malted barley is mixed with hot water in a vessel called a mash tun. The heat activates enzymes present in the malt, which then break down complex starches into simpler sugars. These sugars serve as the food source for yeast during fermentation, ultimately contributing to the alcohol content and flavor profile of the finished IPA.
Mashing typically involves a two-step process known as saccharification, where the temperature is carefully controlled to encourage specific enzymes to convert starches into fermentable sugars. The first step, known as protein rest, occurs at a lower temperature and helps break down proteins in the malt. Following this, the temperature is raised to activate other enzymes responsible for converting starches into sugars, a phase known as the saccharification rest. Mastering the mashing process is crucial in home brewing to ensure the creation of a high-quality IPA with the desired characteristics and alcohol content.
Boiling the Wort for Your IPA
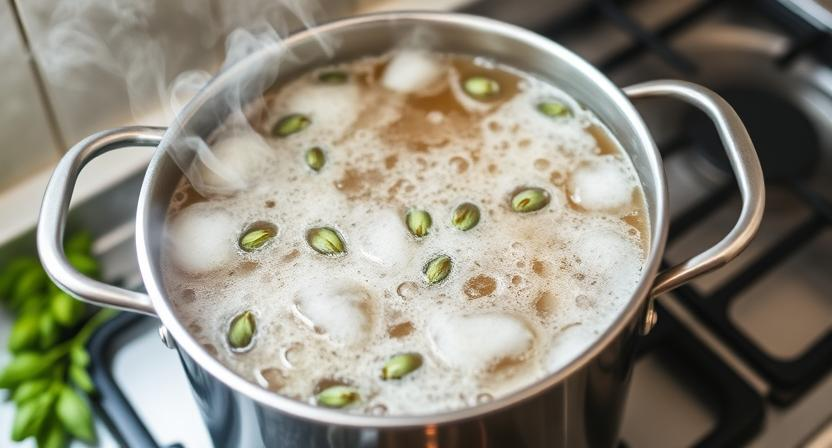
After completing the mashing process, the next step in brewing your IPA is boiling the wort. This crucial step helps to sterilize the liquid, extract hop flavors, and concentrate the sugars for fermentation. The wort is brought to a rolling boil in a large brew pot, which helps to create the foundation of flavors that will define your IPA.
During the boiling process, it is important to keep an eye on the wort and watch for boil-overs. Stirring the wort occasionally can help prevent any potential sticking to the bottom of the pot. Boiling typically lasts around 60 to 90 minutes, allowing the hops to infuse their bitterness and aroma into the liquid. Once the boiling is complete, the wort is ready for the next steps in the brewing process.
Adding Hops to Your IPA Brew
Once the wort reaches a rolling boil, it’s time to add in the hops, a crucial step in creating the distinct flavors and aromas of your IPA. Hops not only contribute bitterness to balance the sweetness of the malt but also impart various floral, citrus, pine, or spicy notes to the brew. Depending on the recipe or desired flavor profile, different hop varieties can be added at specific times during the boiling process.
Adding hops early in the boiling stage enhances bitterness, while adding them later in the process, known as aroma hops, contributes more to the beer’s fragrance. Additionally, dry hopping can be done during fermentation or conditioning to intensify the hop aromas. Experimenting with different combinations and timings of hop additions can result in a customized IPA that suits your preferences.
Cooling Down the Wort Quickly and Efficiently
To cool down the wort quickly and efficiently, immersion chillers are a popular choice among homebrewers. These coils of tubing are connected to a water source and can rapidly reduce the temperature of the wort by circulating cold water around it. By submerging the chiller in the boiling wort during the final stages of the brewing process, heat is quickly drawn away, bringing the temperature down to the desired range for yeast pitching.
Another method for cooling the wort is to create an ice bath in your sink or a large container. Simply place the brew kettle in the ice water and stir the wort gently to promote even cooling. This technique is effective for smaller batches of beer or if you do not have access to an immersion chiller. Keep in mind the importance of cooling the wort swiftly to prevent off-flavors from developing and to encourage a clean fermentation process.
Transferring the Wort to the Fermentation Vessel
Once the boiling process is completed, it is time to transfer the wort to the fermentation vessel. This vessel is where the magic of fermentation will happen, transforming the wort into delicious beer. Carefully and slowly pour the wort from the brew kettle into the fermentation vessel, ensuring not to disturb the sediment at the bottom of the kettle.
As you transfer the wort, you may want to use a strainer or a funnel with a built-in strainer to catch any hop debris or other solids, ensuring a clearer brew. Once all the wort is safely transferred, it is essential to aerate it by either shaking the vessel or using an aeration stone to introduce oxygen. This oxygen is crucial for the yeast’s health during fermentation, allowing them to thrive and produce the desired flavors in your IPA.
Pitching Yeast into the Wort for Fermentation
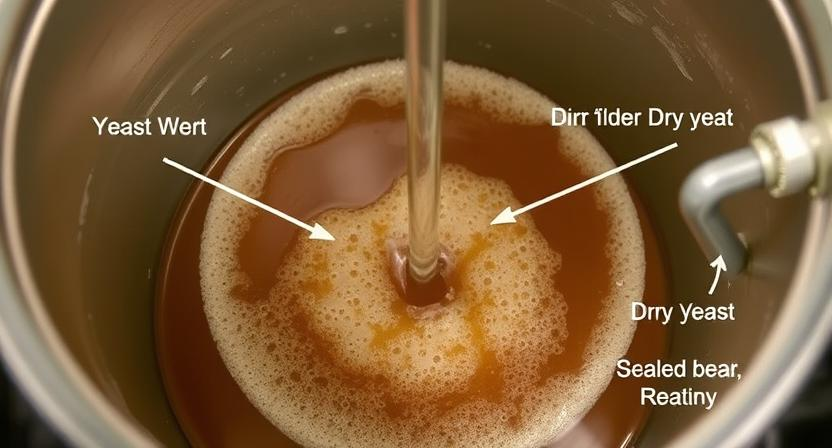
After the wort has been transferred to the fermentation vessel, it’s time to pitch the yeast. Yeast plays a crucial role in the fermentation process by converting sugars into alcohol and carbon dioxide. You can choose between liquid yeast or dry yeast, depending on your preference and availability. Simply sprinkle the dry yeast on top of the wort or rehydrate it according to the manufacturer’s instructions before pitching. For liquid yeast, carefully pour it into the wort and stir gently to ensure even distribution.
Once the yeast is pitched, seal the fermentation vessel with an airlock to allow carbon dioxide to escape while preventing any contaminants from entering. Store the vessel in a cool, dark place with a consistent temperature suitable for fermentation. Within a few hours, you should start seeing signs of fermentation, such as bubbling in the airlock or foam formation on the surface of the wort. It’s essential to monitor the fermentation closely to ensure it progresses smoothly and reaches the desired level of alcohol content.
Monitoring the Fermentation Process Closely
During the fermentation process, it is crucial to regularly check the airlock attached to the fermentation vessel. The airlock enables carbon dioxide produced during fermentation to escape without allowing contaminants to enter. A steady bubbling or gurgling sound indicates that fermentation is active and progressing as expected. However, sudden changes in the frequency or intensity of the bubbling may signal issues such as temperature fluctuations or yeast stress, necessitating immediate attention.
In addition to observing the airlock activity, monitoring the temperature of the fermentation vessel is essential. Yeast have specific temperature ranges in which they perform optimally, and fluctuations outside of these ranges can affect fermentation efficiency and the overall flavor profile of the beer. Use a thermometer strip or a digital thermometer to keep track of the temperature, aiming to maintain a steady and appropriate environment for the yeast throughout the fermentation process.
Deciding on Dry Hopping for Your IPA
Dry hopping is a technique used by brewers to enhance the aroma and flavor of their beer, particularly in hop-forward styles like IPAs. It involves adding hops directly to the fermenter during or after primary fermentation. The decision to dry hop your IPA should be based on the desired intensity of hop aroma and flavor in the final product.
When deciding on dry hopping for your IPA, consider the hop varieties you want to use and the characteristics they will impart to the beer. Popular hop choices for dry hopping include Citra, Simcoe, Amarillo, and Mosaic, among others. Experimenting with different hop combinations can lead to unique flavor profiles in your IPA. Be mindful of the timing and duration of dry hopping to avoid grassy or vegetal off-flavors in the finished beer.
Calculating the Alcohol by Volume (ABV) of Your IPA
To calculate the Alcohol by Volume (ABV) of your IPA, you will need to gather a few measurements. The most crucial data you should have includes the original gravity (OG) and the final gravity (FG) of your beer. Once you have these values, you can use a simple formula to determine the ABV. The formula for calculating ABV is: ABV% = (OG – FG) x 131.25. By plugging in your specific OG and FG numbers into this equation, you will arrive at the ABV percentage of your IPA.
Understanding the ABV of your home-brewed IPA can provide valuable insights into its strength and flavor profile. A higher ABV typically indicates a stronger beer with more pronounced alcohol notes, while a lower ABV may result in a more sessionable and easy-drinking brew. By continuously monitoring and calculating the ABV of your various IPA batches, you can fine-tune your recipes to achieve the perfect balance of flavors and alcohol content tailored to your preferences.
Testing the Specific Gravity of Your IPA
To determine the progression of fermentation in your IPA brew, it is essential to test its specific gravity regularly. This process involves using a hydrometer, a tool that measures the density of your beer compared to water. Before pitching the yeast, take an initial specific gravity reading by submerging the hydrometer into the wort and noting the level at which it floats.
After fermentation has completed or slowed down significantly, take a final specific gravity reading to calculate the alcohol content of your IPA. By comparing the initial and final readings, you can determine the amount of sugar that has been converted into alcohol. This data not only gives you insight into the success of your brewing process but also allows you to fine-tune your future IPA recipes.
Bottling Your IPA Brew
Once your IPA has finished the fermentation process and reached the desired flavor profile, it is time to bottle your brew. Prior to bottling, ensure that all bottles have been thoroughly cleaned and sanitized to prevent any contamination. Using a siphon, carefully transfer the fermented beer from the fermentation vessel into the bottles, leaving some space at the top to allow for carbonation.
After the beer has been bottled, it is time to cap the bottles securely to keep the carbonation in and any air out. Store the bottles in a cool, dark place to allow the beer to carbonate naturally over the next few weeks. Patience is key during this stage as the carbonation process can take time to develop properly. Once the beer is fully carbonated, you can then chill the bottles in the refrigerator before serving to enjoy the fruits of your labor.
Carbonating Your IPA Naturally
After your IPA has finished fermenting and is ready for carbonation, there are a few ways to naturally carbonate your brew. One common method is priming sugar, which involves adding a small amount of sugar to each bottle before sealing it. The remaining yeast in the beer will consume the sugar, producing carbon dioxide as a byproduct, carbonating the beer in the process.
Another natural carbonation technique is called krausening, where a small amount of actively fermenting beer is added to the bottled beer. This introduces additional yeast and sugars to the brew, kickstarting secondary fermentation and achieving carbonation. Whichever method you choose, be sure to allow enough time for the carbonation process to take place before enjoying your home-brewed IPA.
• Priming sugar method involves adding sugar to each bottle before sealing
• Remaining yeast consumes sugar, producing carbon dioxide and carbonating the beer
• Krausening technique adds actively fermenting beer to bottled beer
• Introduces additional yeast and sugars, kickstarting secondary fermentation for carbonation
• Allow enough time for the carbonation process before enjoying your home-brewed IPA
Labeling Your Bottles for Personalization
Once your IPA has finished brewing and has been properly bottled, it’s time to add a personal touch by labeling the bottles. This step not only adds a fun and creative aspect to your home-brewing process but also helps you easily identify different brews in your collection. Consider using waterproof labels or markers to prevent the labels from smudging or coming off when the bottles are chilling in the fridge.
Get creative with your labeling by naming your IPA brew or designing a unique logo that represents your home brewery. You can also include important details such as the brew date, ABV percentage, and any special ingredients used in the IPA. Personalizing your labels not only adds a decorative element to your bottles but also makes for a great conversation starter when sharing your home-brewed IPAs with friends and family.
Storing Your IPA Bottles Properly
After bottling your IPA brew, proper storage is crucial to maintain the quality and flavor of your beer. Store your IPA bottles in a cool, dark place to prevent any exposure to sunlight, which can cause off-flavors and skunking. Sunlight can break down hop compounds in the beer, leading to a stale taste. Additionally, fluctuations in temperature can negatively impact the beer’s flavor, so it is essential to store your IPA bottles in a consistent environment.
Keep your IPA bottles upright to minimize the contact between the beer and the bottle cap, which can lead to corrosion and potentially affect the taste of your brew. Avoid storing your beer in the fridge door as it experiences more temperature fluctuations compared to the interior of the fridge. Instead, choose a spot in your refrigerator or a dedicated beer cellar with a stable temperature to ensure that your IPA remains fresh and enjoyable until you’re ready to savor its hoppy goodness.
Pouring and Enjoying Your Home-Brewed IPA
When it finally comes time to pour and enjoy your homemade IPA, it’s a moment of satisfaction and pride after the brewing process. Choose the appropriate glassware for serving the IPA, such as a tulip glass or a pint glass, to enhance the aroma and flavor of the beer. Hold the glass at a slight angle while pouring to promote a good head and release any trapped carbonation, ensuring an optimal tasting experience.
As you pour the IPA into the glass, take a moment to appreciate the beer’s color, clarity, and effervescence. Admire the foamy head that forms on top of the beer, releasing enticing aromas of hops and malt. Raise the glass to your nose and take in the aroma deeply before taking your first sip. When you finally taste your home-brewed IPA, savor the combination of flavors, noting the bitterness from the hops, the sweetness from the malt, and any other complex undertones that make your brew unique. Cheers to your brewing skills and the enjoyment of a well-crafted IPA!
Troubleshooting Common Issues in Home Brewing
When encountering common issues in home brewing, it is essential to stay calm and methodical in your approach. One common issue that brewers face is contamination during the fermentation process. If you notice off-smells, strange colors, or unusual growth in your beer, it may be a sign of contamination. To prevent this, make sure all your equipment is properly sanitized before use and maintain a clean brewing environment.
Another common issue that home brewers may encounter is a stuck fermentation, where the yeast fails to ferment the sugars completely. This can lead to a sweet or cloying taste in your beer. To troubleshoot this problem, you can try gently swirling the fermentation vessel to rouse the yeast or increasing the temperature slightly to help reinvigorate fermentation. Additionally, checking the yeast viability and making sure you have enough yeast pitched initially can also help prevent a stuck fermentation.
Sharing Your IPA with Friends and Family
After the lengthy process of brewing your own IPA at home, the most satisfying moment may come when you get to share your creation with those closest to you. Inviting friends and family to taste your handcrafted brew can be a rewarding experience, allowing you to showcase your passion for brewing and offering them a unique opportunity to enjoy a personalized beer made with care and dedication.
As you pour a glass of your homemade IPA for your loved ones, take the time to share the story behind the brew. Explain the ingredients you used, the process you followed, and the inspiration behind your choice of flavors. This personal touch can enhance their appreciation for the beer and make the tasting experience even more special. Encourage them to savor the complex aromas and flavors of the IPA, and be open to receiving feedback that can help you improve your brewing skills for future batches.